Home Inspection Articles

Mind Your A's and Q's? Air Quality Inspections Explained

Posted by Thea Scrimger on Jun 12, 2013 2:41:00 PM

June Newsletter

Poll

June is finally upon us - it's time to break out the sunscreen, barbeque tongs, lounge chairs, and...tissues? Unfortunately, sunshine brings allergens and this summer is being projected as one of the worst for pollen we've seen in a long time. As many people experience the joys of itchy eyes, runny noses, and sneezing fits, we thought it prudent to talk about the allergens present in your home. Over 64% of the 22 individuals we surveyed last month admitted they were concerned about the air quality in their home.

Air quality is an issue that encompasses many areas, so we reached out to our newest Specialty Service partner, LEAP Management Inc, to discuss air quality issues and how they are assessed. We spoke directly with inspector Lilja Palsson, B.Sc., Dip., Eng., CRSP. Lilja has a degree in Microbiology from the University of Waterloo, a post-degree diploma in Environmental Engineering Technology from Conestoga College, a certificate in Occupational Health and Safety from Ryerson, and she is also a Canadian Registered Safety Professional. 

Carson Dunlop: How does an air quality assessment work; what happens during this type of assessment?
Lilja Palsson:
"Air quality is a very broad term. When doing this type of assessment, I first talk to the client about their concerns. Are they experiencing allergic symptoms such as headache, sore throat, or respiratory distress? Is there an odor? After discussing what issues they're experiencing, I decide what kind of parameters I would like to sample for - perhaps air sampling and assessment for mold; or maybe a more sophisticated sampling device to determine the source of an odor. I'll run a few air samples and do a visual inspection to see if there are any issues that caught my eye (staining, spray foam, etc.)."

CD: What is the most common misconception homeowners have in relation to air quality?
LP:
"Homeowners tend to think that events such as flooding, sewer backup, installing spray foam, renovations, etc. will not affect the indoor air quality of their home. They often do not associate any illness or symptoms they are experiencing as being related to those events. The correlation between air quality and homeownerships and maintenance issues tends to go unnoticed."

CD: What is the weirdest thing you've encountered during an air quality inspection?
LP: "I did find gold in someone's attic while sampling vermiculite. A previous owner of the home had stashed an old cookie tin full of tacky gold jewelry that I found while taking samples in the attic. I brought the tin down for the owner and we looked at it. I think it was from the 1940s or so. She had the jewelry appraised - she didn't tell me the exact amount but she called to thank me and said that I paid for myself and more!"

CD: What simple, preventative maintenance can homeowners undertake to help preserve their air quality?
LP:
"In terms of preventative maintenance I would say always monitor your home for potential leaks, floods and other water issues. Replace your roof before it leaks; clean your gutters regularly; caulk your windows and replace them before they leak; make sure your basement is waterproofed before you finish it; use your washroom fan; make sure your bathtub is well-caulked; keep your home well-ventilated in the summer and sealed with the furnace running in the winter; if you add insulation to your attic, add ventilation as well - I really could go on, but I know this is an article, not a novel."

As a Home Inspection company our aim is to keep homeowners safe, warm and dry. Much like Lilja, we believe in the importance of home maintenance as it pertains to keeping families comfortable and secure in their homes. Carson Dunlop's Home Reference Book outlines many strategies for helping homeowners maintain their properties. To learn more about how this text can help you, please click here.

In addition, our Specialty Services program provides our clients and real estate partners with fast, easy and cost-effective access to qualified specialists, like LEAP Management Inc, all with a single call. To learn more, please click here or call 1-800-268-7070 to schedule an air quality assessment. 

Topics: Home Reference Book, Air Quality, Home Inspection, Monthly Newsletters, Specialty Services, Homeowner Tips

Undertaking Home Repairs: A Quick Guide

Posted by Thea Scrimger on May 7, 2013 2:48:00 PM

Spring is a great time for performing maintenance tasks and taking care of other home improvements you may need or want. While home renovation projects are exciting, they can also be overwhelming - it's important to ensure that you are in good hands.

We have developed eight key steps to getting repairs successfully completed around your home.

HomeRenovation
  1. Know what you want done.

    If you are repairing a roof with a leaking valley flashing, for example, decide whether you want the valley flashing replaced, or just patched to last a few years until the whole roof needs reshingling.
    If you know what you want done, you can compare apples to apples when reviewing quotations. Otherwise it will be very hard to compare various quotes if every contractor has a different repair strategy.
     
  2. Find at least three experienced, reputable contractors who are capable of the work you need completed.

    While personal referrals from people you trust are a great starting point, take them with a grain of salt. Former customers of contractors are not usually in a position to comment on the quality of the installation of a furnace, for example. Also, be sure the type of work you are planning to have done is similar (in size and scope) to the work done for the person providing the referral. Many contractors who are geared to do major renovations are not well-suited to do minor repairs, and vice versa.
     
  3. Obtain three written estimates.

    Our experience has shown that contractors' quotes can vary as much as 300% on any given job. This is sometimes due to different perceptions of what needs to be done. Be prepared to do your research and stick to your guns - many contractors will tell you that the job is much bigger, much harder, or must be done their way (for a variety of reasons). As Home Inspectors, we are often faced with contractor opinions that differ drastically from the recommendations in our reports. In many of these cases, the contractor is proposing unnecessary work.
     
  4. Get three references from each contractor.

    Better than three references is a list of the recent clients that the contractor has worked for. That way you get to choose who you would like to select as a reference. Follow up with these references, bearing in mind the requirements we advised you on, in regards to your personal references. While you are at it, ensure that the contractor has appropriate licenses and insurance.
     
  5. Choose the contractor.

    Don't base your choice on price alone; look carefully at what has been included in the estimates. Strongly consider choosing the contractor with the best reputation, provided that the price for the job is fair. Avoid paying cash - the benefit of a cash deal is typically far greater for the contractor than it is for the homeowner.
     
  6. Have both parties sign a contract.

    The contract should include a complete description of the work. It should also include details such as whose responsibility it is to obtain permits. (If there is any doubt regarding the necessity of a permit, contact your local building department).

    The contract should have a start date and a completion date. (On larger contracts, sometimes a penalty clause is included for each day the job extends beyond the completion date).

    The contract must also contain a payment schedule. The schedule should not demand very much money up front and the payment should be based on the stages of completion as opposed to pre-determined dates.

    Remember to hold back 10% of each payment for 45 days after the completion of the job to determine whether any liens have been placed on the property (as a result of the contractor not paying his sub-contractors).

    Also, don't expect much in the way of a guarantee if you are asking a contractor to undertake band-aid repairs. Many contractors will not simply patch a damaged valley flashing, for example, even if they are 95% sure that the repair will work. This is because there is still a 5% chance that they will get complaints to fix a subsequent leak. In fairness, the leakage is not their fault. They just do not want the hassles. Consequently, many contractors will suggest repairs which are overkill (replacing the entire side of the roof, for example) to reduce the potential for complaints. A significantly lower price can be obtained if you explain to the contractor that you expect them to do their best, but you aren't going to make them responsible for the future of the entire roof based on a $300 repair.
     
  7. Expect delays.

    Any type of home repair seems to take longer than was first predicted.
     
  8. Have a contingency fund.

    Many home repairs end up unearthing something else that requires repairing. While this is very common, ask lots of questions if you contractor is proposing additional work.

At Carson Dunlop we recognize that a great Home Inspection is just one part of the homeownership process - which is why we promise to stand by our clients for as long as they own their home. We have developed tools and resources to help in every stage of the homeownership journey, like the Carson Dunlop Homeowners Association, our not-for-profit benefits program which gives clients access to exclusive discounts and savings with partners like Canadian Tire and Perkopolis. To learn more about the Association, please click here.

Interested in doing more research before taking on your home renovation projects? Check out our articles on Home Systems' Life Cycles and Home Improvement Costs. In addition, with our Home Reference Book, learning about your home has never been easier. To find out more about the value of this text, please click here.
 

Topics: Home Reference Book, Home Inspection, Homeowners Association, Carson Dunlop, Homeowner Tips

In Search of the Perfect House

Posted by Thea Scrimger on Apr 30, 2013 4:37:00 PM

With the spring real estate market in full swing, many potential home buyers are in pursuit of the perfect house. Unfortunately, our experience over the past 35 years and more than 120,000 inspections has shown us that no home is perfect, even if it is brand new.

A lot of the homes we inspect do not have major issues, but it is important to understand that no home is perfect. Since absolute perfection is not an option, when you are potentially purchasing a home what should you expect in terms of regular maintenance and repair costs? The 1% rule.

When you consider the life cycle of every component of a house, a reasonable estimate of the annual cost of normal maintenance is 1% of the value of the house. One year you may replace the furnace; a few years down the road you may re-surface the roof. Throw in the odd unexpected repair in between and you should average about 1% per year. This number is fairly accurate for most homes, regardless of their size and expense.

Carson Dunlop has developed a helpful list of the average life expectancies of the major systems in the home. All components and systems eventually wear out. Fortunately, they don’t all wear out at the same time. Different components have different life cycles. Houses tend to settle into what you might call a “normal maintenance pattern”.

Life Cycles of Common Components of the Home*

Homes

Roof

 
Conventional asphalt shingles 12-15 years
Premium quality asphalt shingles 25-30 years
Slate 40-200 years
Tar & gravel roof (built up roof) 15-20 years
Modified bitumen roof membrane 15-20 years
Roll roofing  5-10 years

 
Exterior

 
Gutters & downspouts   20-30 years
Aluminum siding 50+ years
Wood siding Maintenance dependent
Stucco Maintenance dependent
Exterior paint  4-6 years 
Wood deck  10-20 years 
Asphalt driveway  10-20 years 
Driveway sealer  1-3 years 
Concrete driveway  30-40 years 
Garage door opener   8-12 years 

 
Structure

 
Termite treatment  10-20 years

 
Heating

 
Furnace 18-25 years
Cast iron boiler 35-50 years
Steel boiler 20-30 years
Copper tube boiler 10-20 years
Humidifier 5-10 years
Electronic air filter  10-20 years

 
Cooling

 
Air conditioning compressor 10-15 years


Plumbing

 
Toilet 30-40 years
Sink 12-20 years
Faucet  10-15 years 
Whirlpool bath  15-25 years 
Shower pan  Unpredictable
Submersible pump for well  10-15 years 
Suction or jet pump   10-15 years 
Water softener  5-15 years 
Sump pump  2-7 years 
Water heater   8-12 years 
Tile bathtub enclosure  10-50 years 


Interior

 
Paint 5-10 years
Windows Maintenance dependent


Interested in learning more about normal maintenance items and the costs associated with replacing or repairing them? Check out our blog on Home Improvement Costs. Carson Dunlop’s Home Reference Book also includes a wealth of information on these subjects as well as other areas related to homeownership, click here to learn more about the value of this text.

*Please keep in mind that there will be exceptions in every category.

Topics: Home Reference Book, Home Inspection, Carson Dunlop, Homeowner Tips

Priority Maintenance for Spring

Posted by Thea Scrimger on Apr 18, 2013 11:26:00 AM

springtimeIt's official: spring has sprung. We will let you enjoy the sun for a moment, but we know that warm weather brings many things, one of them being housework. Trying to be proactive for spring cleaners and spring market hopefuls, Carson Dunlop has compiled a list of maintenance items, both annual and monthly, to help keep your property secure and your family comfortable - whether you're sprucing your home up for the season or purchasing a new one.


The list below is the top ten maintenance items we encourage homeowners to consider as they begin their spring cleaning. It is by no means all-inclusive, but it should help you get started on the right foot this season. 


Top Ten Spring Maintenance Items

  1. Clean the gutters - it's important to ensure they remain unobstructed to help keep water flowing where it should. Click here to see our article on gutter maintenance tactics.
  2. Check for damaged roofing and flashing materials - we encourage you to perform this task twice a year, preferably in the spring and fall when it's easier to gain an unobstructed view of your roof. Click here to see our article on protecting your roof.
  3. Cut back trees and shrubs from the house walls, roof and air conditioning systems as needed.
  4. Clean the tracks on horizontal sliding windows annually, and ensure the drain holes are clear.
  5. On a monthly basis, test ground fault circuit interrupters, arc fault circuit interrupters, carbon monoxide detectors and smoke detectors using the test button. Click here to learn more about ground fault circuit interrupters. Click here to learn about carbon monoxide detectors.
  6. Service your furnace or boiler yearly - why not check it off your list as you complete the rest of your spring maintenance?
  7. Check your furnace filters, humidifiers and electronic air cleaners monthly. Click here to read about how furnace filter maintenance is economic and responsible.
  8. Check your bathtub and shower caulking monthly and improve promptly as needed.
  9. Turn on outdoor water faucets in the spring - and remember to turn them off in the fall.
  10. Check your attic for evidence of leaks and condensation and make sure vents are not obstructed - try to complete this task every season, but failing that, ensure you check twice a year.


Interested in more home maintenance advice? Carson Dunlop's Home Reference Book has a wealth of information for homeowners, outlining how the systems in a home work, and what it means when they fail to work. Offered in two convenient formats, soft cover and eBook, the Home Reference Book is a great guide to homeownership. To learn more or purchase the book, please click here or call 800.268.7070.

Topics: Home Reference Book, Home Inspection, Carson Dunlop, Homeowner Tips

Vermiculite and UFFI: What Homeowners Need to Know

Posted by Thea Scrimger on Feb 11, 2013 9:31:00 AM

VermiculiteVermiculite insulation and urea-formaldehyde foam insulation (UFFI) possess properties whose histories cause many to consider them hazardous materials. Some homeowners are familiar with the controversy surrounding these types of insulation, however many are not. Below we've outlined what each type of insulation is and why misconceptions about their safety exist.

Vermiculite

Vermiculite is a naturally occurring mineral worldwide. When heated rapidly to high temperatures, this crystalline mineral expands into low density, accordion-like, golden brown strands. In addition to being light, vermiculite chunks are also absorbent and fire retardant. These characteristics make it a great insulating material. With the upsurge in homeownership during the baby boom, vermiculite insulation was a popular material in the 1950s and continued with the energy crisis into the late 1970s. In Canada, it was one of the insulating materials allowed under the Canadian Home Insulation Program from about 1976 to the mid 1980s. Sold under various brand names, such as Zonolite Attic Insulation, the insulation came in big bags. Thousands of homeowners simply opened the bags and poured the vermiculite into their attic floor, as well as down exterior walls.

The majority of the vermiculite used worldwide was from a mine in Libby, Montana. As well as being rich in vermiculite, this mine had the misfortune of having a deposit of tremolite, a type of asbestos. Asbestos minerals tend to separate into microscopic particles that become airborne and are easily inhaled. People exposed to asbestos in the workplace have developed several life-threatening diseases, including lung cancer – workers in and around the Libby mine developed serious health problems. When the vermiculite was extracted from the mine in Libby, some tremolite came in with it, posing a potential threat to homeowners.

Like any hazards, length and intensity of exposure are major factors in the risk of asbestos related respiratory illnesses. To assess the risk of asbestos exposure in a home, a sample of the vermiculite would need to be analyzed in a lab. Since most of the vermiculite in Canada was taken from the Libby mine, the odds are quite good that there is asbestos in the vermiculite in Canadian attics.

If the attic or walls of a home contain vermiculite insulation, avoid disturbing the material. Do not sweep it, vacuum it up, or store belongings in the attic. If work is planned that involves these areas, like installing potlights in a room below the attic, send a sample of the vermiculite to a lab for testing. If it is found to contain asbestos, or if you assume it does, precautions should be taken. The safest approach would be to have the insulation in the affected areas removed by a qualified environmental contractor. 

Urea-Formaldehyde Foam Insulation (UFFI)

UFFI is injected as a mixture of urea-formaldehyde resin, an acidic foaming agent, and a propellant, such as air. It was commonly used in existing houses by injecting the foam into areas where it was impractical to provide conventional insulation, like behind walls. When the mixture is injected into the wall, urea and formaldehyde unite and “cure” into an insulating foam plastic. Some formaldehyde gas is released during the on-site mixing and curing. It is this by-product of the curing of the foam that became a controversial issue.

UFFI was used in the 1970s, most extensively from 1975 to 1978, during the period of the Canadian Home Insulation Program (CHIP), when financial incentives were offered by the government to upgrade home insulation levels. The insulation was banned in Canada in December 1980. It is estimated that over 100,000 homes in Canada were insulated with UFFI. The insulation was also used extensively in the United States during the 1970s and has also been used in Europe over the last thirty years. In the U.S., the Consumer Product Safety Commission banned the sale of UFFI in 1982, and shortly thereafter a law prohibiting the sale of urea-formaldehyde was enacted. In April 1983, the U.S. Court of Appeal struck down the law because there was no substantial evidence clearly linking UFFI to health complaints. Still, UFFI is not widely used in the U.S. today. UFFI is still used in Europe where it was never banned and is considered one of the better “retrofit” insulations.

A laboratory study which produced nasal cancers in rats that were exposed to high levels of formaldehyde caused government concern. Following some press releases and cautioning by authorities, a number of homeowners began to report problems that included respiratory difficulties, eye irritation, runny noses, nosebleeds, headaches, and fatigue. Although there were no substantiated problems clearly attributable to the foam, UFFI was banned as a precautionary measure.

A number of studies have been done examining the health effects of UFFI. Studies done before the ban, using random samples of UFFI and non-UFFI homes, showed no impact of UFFI on health. However, studies done after the ban showed increased reporting of symptoms, even for such things as constipation and deafness, which have no biological basis.

After the longest and most expensive civil case ever held in Canada was concluded in the Quebec Supreme Court, not only was no basis for a settlement found, but the plaintiffs were obliged to pay most of the costs. The conclusion to be drawn from all this is that UFFI has not been shown to be a health concern. However, as a result of its history, UFFI related fears and concerns remain.

While UFFI has been proven to possess minimal health risks, and vermiculite insulation presents no threat when left undisturbed, both types of insulation continue to be viewed as hazardous by the general public. Although we encourage homeowners to educate themselves beyond these misconceptions and historical inaccuracies, we also recognize that many living with these types of insulation might feel more comfortable having a specialist take a closer look at their home.

If you are worried about the air quality of your home having an assessment performed by an environmental specialist can provide you with some added security. Carson Dunlop has partnered with a number of reputable and qualified companies to provide specialty services to our clients. These services complement our Home Inspections, targeting potential areas of concern which fall outside the scope of a regular Home Inspection. Our customer service team can now help to schedule Indoor Air Quality Assessment or Asbestos Testing, as well as other Specialty Services. This new program allows us to provide our clients and real estate partners with fast, easy and cost-effective access to qualified specialty service provides all within a single phone call. To learn more about this program and the complete list of services we can help to schedule, please click here or call 800.268.7070.

Topics: Home Reference Book, Homeowners, Home Inspection, Carson Dunlop, Specialty Services

What is an Ice Dam? - Prevention and Advice

Posted by Thea Scrimger on Dec 4, 2012 12:56:00 PM

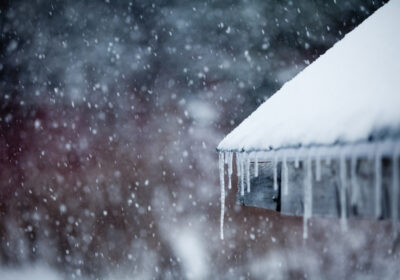
SeeAProblem?Snow on your driveway is seldom more than a pain in the back. However, snow on your roof can lead to leakage, even if your roof is new. The culprit is ice damming, the insidious snow-melting phenomenon that many of us are well-acquainted with. Since ice damming is climate driven, warm weather can make many believe that come summer, their problem is solved -- think again. Without a permanent solution ice dams will continue to form on your roof when it gets cold enough. If your roof experienced ice damming last winter, now is an opportune time to guard yourself against this issue and the damage it causes. As winter fast approaches, we encourage homeowners to re-familiarize themselves with ice damming to help better protect their roofs and their homes.

What is Ice Damming?

Heat escapes from improperly sealed or poorly insulated portions of the roof, melting the snow above. As the snow melts, it runs down the roof until it encounters unmelted snow over an unheated space on the roof. There, it will stop and refreeze. This process will continue until an ice dam is formed.

Why is Ice Damming Problematic?

These dams cause the water that runs down the warm portion of the roof to pool behind the dam and back up under the shingles. Once the water from the ice dam gets under the shingles it is free to leak into the ceiling and the wall. While it is periodic, (eventually the weather will warm up, thus stopping the leak), this water intrusion can become costly. If left uncorrected, water damage will occur to at least the ceiling or wall finishes, and at worst, there is a potential for structural rot.

How can Ice Damming be Prevented?

There are two major preventative measures to consider when approaching the issue of ice damming.

1. Adding attic insulation: This will work well depending on the attic in question. However, some attics have so many warm air leaks that it would be impossible to add enough insulation to fix the problem.

2. Sealing the air leakage paths into the attic space: In many cases, with proper sealing tools a homeowner can take care of this task themselves. However, some instances require a specialist to find and fix the issue. Common air leakage paths include attic access hatches, ceiling light fixtures like pot lights, and plumbing stacks.

For more helpful tips about your home, check out the Home Reference Book for the ultimate homeowners' guide to home maintenance. You can also sign up to our blog, start following us on Twitter, or like us on Facebook for more advice and information.

Topics: Home Reference Book, Homeowners, Home Inspection, Carson Dunlop, Homeowner Tips

Fireplaces - The Magic and The Mystery

Posted by Olivia Hunt on Nov 23, 2012 12:17:00 PM

Blocked ChimneyWhile fireplaces are no longer used as the primary source for heating homes, there are few things nicer than a cheery fire - especially on a cold winter night. By the same token, there are few things more distressing than a fireplace which doesn’t draw smoky air up into the chimney:  belching smoke into the home, chasing people out, setting off smoke detectors, and covering your house in dirt.

So why do some fireplaces draw perfectly, and others so poorly? Usually it comes down to the design of the fireplace. For our technical picture of basic masonry chimney and fireplace components, click here. Some of the factors which affect fireplace performance include:

1) Ratio of the Fireplace Opening to Chimney Flue Size

The area of the flue should be roughly 1/12th the size of the opening area. If the flue is too small, the fireplace will smoke.

2) Chimney Height

In this case, the taller the chimney the better – chimneys that are too short will cause draw issues.  A good guideline to follow is to have your chimney at least 3 feet above the roof and 2 feet higher than anything within 10 feet of it.

3) Damper Size and Location

It’s important to ensure that your damper isn’t too small, too low or too far back. It should be the full width of the firebox and at least 6 inches above the top of the opening. The damper is usually closer to the front of the fireplace than the back.

4) Smoke Chamber Slope and Smoothness

The smoke chamber above the damper should be as smooth as possible, and should slope no more than 45o as it funnels the smoke from the damper opening into the chimney.

While most fireplaces break at least some of the rules of good design, many tend to work well despite this. Fireplace design is more of an art than a science. As there are so many factors which affect the draw, it is impossible to know how “perfect” the unit has to be in order to work properly. If you’re having issues with your fireplace not drawing well, consider some of the following solutions:

Reduce the Opening Size – This can be achieved by laying an additional row of firebrick on the floor of the firebox. Before you start laying brick, you can test the solution by holding a piece of metal over part of the opening and watching to see if the draft improves.

Extend the Chimney – This is expensive but often successful. Less expensive alternatives include a rain cap or a metal draft hood which rotates with the wind so that smoke is always released downwind.

Verify the Chimney is Unobstructed – Sometimes unwanted guests can make their home in your chimney. Verify that the flue is unobstructed all the way up. Occasionally, this can be done from below with a mirror when the damper is open. Otherwise, a top down look may be required. (A specialist may be required for this review).

Move the Fire Back – Oftentimes, the fire is simply too close to the front of the firebox and needs to be moved back. Unfortunately, if the fireplace is too shallow to permit this, the fireplace may have to be rebuilt.

Add Air – A fireplace which is starved for air won’t work properly. Sometimes opening a window in the room with the fireplace will supply enough air. Fireplace draw is more difficult to achieve if the house is under negative pressure. Negative pressure occurs when the air pressure in the house is less than the air pressure outside the house.  Don’t have exhaust fans on or your clothes dryer running while trying to start a fire. This is particularly true for newer, tighter houses.  You will also find it’s easier to start a fire when the furnace is in an off cycle. In addition, glass doors help to protect the fireplace from negative pressure effects in the house, especially if combustion air can be brought in from outside.

Warm the Flue – This is a trick most people know about. Pushing a burning piece of rolled-up newspaper up past the damper will help overcome the column of cold air in the chimney and allow a good draft to be established quickly.

Damper or smoke chamber modifications are possible but should be considered last resorts, especially as they are expensive. If you’ve worked through this list of solutions and still find yourself with fireplace issues, it’s time to call a specialist as more extensive work may be required.

If you want to learn more about your home and enjoyed these tips, order a copy of the Home Reference Book or subscribe to our blog. You can also follow us on Twitter or like us on Facebook.

Topics: Home Reference Book, Homeowner Tips

Radon - What Is It and How Do I Test For It?

Posted by Olivia Hunt on Nov 22, 2012 3:10:00 PM

Radon

The presence of radon in Canadian homes has become a popular topic in the news lately. Health Canada has recently completed a two-year study that discovered roughly 7% of Canadians, or 1 in 14 people, are living in homes with radon levels above the national guideline.* While this statistic is significant, the good news is that homes can be easily tested and high radon levels can be addressed relatively inexpensively.

What Is Radon?

Radon is an invisible, odorless, tasteless gas that occurs naturally in the earth’s crust. It is created by the decay of uranium. Areas subject to above acceptable levels of radon gas exhibit high concentrations of uranium in the earth and have cracks or porous soils through which the gas can migrate up to the surface.

Why Is It Dangerous?

The radon gas itself is not necessarily an issue - its decay products are. These products are radioactive particles that can attach themselves to lung tissue when radon gas is inhaled, which may in turn cause lung cancer. Health Canada estimates that 16% of all lung cancer deaths in Canada are related to radon exposure.* Just like cigarette smoke, the risk is higher with greater exposure and the effects are long term rather than immediate.

How Does Radon Get Into Your Home?

Radon makes its way into buildings through cracks in basement floors and walls, openings around pipes and electrical services, through water supplies, and basement floor drains, for example.

In buildings, radon gas can get trapped, contributing to potential hazards for occupants. However, when radon escapes directly into the outdoor air it doesn’t pose the same threat as it dilutes quickly.

How To Test For Radon

The identification of radon gas in a home is not part of a standard Home Inspection. However, there are several types of detectors available for testing radon levels. They include:

1)    A charcoal canister that can be used to absorb radon from the air.

2)    Etch detectors that use a sensitive plastic surface. The radon will leave tracks or etchings on the plastic which then can be measured.

3)    Filtering systems where air is pumped through a filter.

4)    Grab sample testers that allow for short term testing by simply taking a sample of air. These tests may require additional laboratory analysis.

How to Lower Radon in Houses

 There are several techniques used to lower radon levels in buildings that include:

  • Sealing cracks, gaps and holes in the basement floor
  • Adding a mechanical ventilation system that draws air and radon from beneath the basement, discharging the air directly to the exterior of the home

Carson Dunlop supports radon testing in homes due to the potential health concerns. We also believe that home buyers should not walk away from a real estate transaction due to a radon issue since this issue can be easily remedied. Radon mitigation systems have been in place for a long time in the United States and their performance is well documented. In many areas, the average installation price is $2500.

If you’re interested in testing your home for radon, visit our page on Specialty Services. For more information on radon, Health Canada is an excellent source as well as the Radiation Safety Institute of Canada


*SOURCE: Health Canada, Cross-Canada Survey of Radon Concentrations in Homes Report

Topics: Home Reference Book, Homeowner Tips

Furnace Humidifiers 101

Posted by Olivia Hunt on Nov 19, 2012 4:04:00 PM

Furnace HumidifierAs the outside air becomes cold and dry, so too does the air inside our homes. So how do we achieve a more comfortable environment? By improving our home’s humidity! Ensuring that you have the right level of humidity in your house can make the cold winter months a lot more comfortable and enjoyable for you and your family. At Carson Dunlop, we are often asked a variety of questions about furnace humidifiers. The most commonly asked questions include:

  •  “Do I need a furnace humidifier?”
  •  “Do I have a furnace humidifier?”
  •  “How do I maintain my humidifier?”

 Do I Need a Humidifier?

If your house is new, you may not have a humidifier. However, you may not need one because the foundation and wood framing are still drying out, releasing moisture into the air. In addition, new houses are “tight”, which means the air within them hangs around for a while before being replaced by dry exterior air. The air is around long enough to pick up moisture from things like showers, cooking, drying clothes and breathing. By comparison, older houses are drafty. Cold, dry air is creeping in all the time, drying out the home as it flushes the warm moist air out.

Do I have a Humidifier in my House Already?

If there is a small box like the one in the picture above hanging from the furnace or ductwork beside the furnace with a small electrical wire and a small water hose attached, you have a humidifier. You may also see a humidistat, a dial that looks like the thermostat but is used to control the humidity level, and is often mounted to the basement ductwork.

The two most common humidifiers include:

1) Drum Type Humidifiers

A drum type humidifier has a tray of water with a sponge, barrel or drum rotating through it. The tray is kept full of water with a float switch, which allows the water from the plumbing system to enter the tray when the water level drops. When the humidistat is turned up or the humidity level drops, a small electric motor rotates the sponge drum through the tray, absorbing water. Some of the air moving through the ductwork blows across the sponge, picking up moisture. This moist air moves through the ducts and into the rooms.

2) Trickle (Cascade) Type Humidifiers

Cascade type humidifiers have no tray of water. A small electric valve at the top controls the water supply to the humidifier. When the humidistat calls for water, the valve opens, trickling water down a honeycomb-like metal pad. Air blows across the pad, picking up moisture. Excess water is drained through a hose to a floor drain, laundry tub, or condensate pump.

How Do I Maintain My Humidifier?

If you have a drum type unit, the tray of sitting water is your nemesis. Ponding water can cause scale build-up and bacterial growth. Every spring, the water supply pipe valve should be turned off, the tray and sponge should be cleaned, and the humidistat should be set to OFF. In the fall, turn on the water valve, and set the humidistat to 35%. We recommend a mid-winter cleaning as well.

If you have a cascade type unit, turn off the water supply and turn the humidistat to OFF in the spring. Before use in the fall, remove and soak the pad in a de-scaling solution. If it is damaged or too clogged to clean, the pad can be replaced. Once the pad is back in place, the water supply pipe valve can be turned back on, and the humidistat set to 35%. This unit will not need cleaning again until next year.

How Much is Too Much?

While an ideal humidity for homes can be as low as 5%, people feel the most comfortable in environments with about 60% humidity. Unfortunately, houses can have a hard time coping with this in cold weather. Too little humidity makes people feel uncomfortable. Too much can cause condensation, mold, mildew, and rot in homes as the warm moist air hits cool surfaces. Contrary to common sense, homeowners actually have to LOWER the humidistat setting as the weather outside gets colder. Why? The colder it is outside, the easier it is for condensation to form on cool surfaces like windows. Homeowners can reduce condensation by lowering the interior humidity level. The recommended house humidity levels are:


 Outside Temperature

 Recommended House Humidity

 -20°F

 15%

 -20°F to -10°F

 20%

 -10°F to 0°F

 25%

 0°F to +10°F

 35%

 +10°F and above

 40%

 Summer months

 Off


Keeping an eye on the amount of condensation on your windows is another great way to gauge your house humidity level. In addition, room temperature and humidity monitors available at hardware and building supply stores can also help you manage humidity.

If you want to learn more about your home and enjoyed these tips, order a copy of the Home Reference Book. You can also receive all the latest updates from Carson Dunlop by subscribing to our blog, following us on Twitter or liking us on Facebook.

Topics: Home Reference Book, Homeowner Tips

Home Improvement Costs

Posted by Thea Scrimger on Nov 14, 2012 1:07:00 PM
RenovationExpectations

Often times a home will be sold “as is” or marketed as a “fixer-upper”. While these terms do provide an indication of the current state of the home, they can lead to a misunderstanding when it comes to overall expense. Minor repair fees can easily accumulate, resulting in a drastic disparity between the agreed upon asking price of a home and what it ultimately costs. 

Our experience has shown that actual contractor quotations can vary by as much as 300%. Naturally, the quality of workmanship and materials are reflected in a contractor’s fee. As well, the complexity of the job, accessibility and even economic conditions can also alter actual costs. As such, the following prices are intended as estimates for repairs or improvements to a typical three-bedroom home:

Roofing/Flashings/Chimneys

Install conventional asphalt shingles over existing shingles $2.00 - $4.00 per sq. ft.
Strip and reshingle with convention asphalt shingles $2.75 - $5.50 per sq.ft.
Strip and reshingle with premium quality asphalt shingles $5.00 - $10.00 per sq. ft.
Strip and re-roof with cedar shingles  $9.00 - $18.00 per sq. ft. 
Strip and replace built-up tar and gravel roof  $10.00 - $20.00 per sq. ft. (min. $1,000.00)  
Strip and replace single-ply membrane  $10.00 - $20.00 per sq. ft. (min. $1,000.00) 
Reflash typical skylight or chimney  $500.00 - $1,000.000  
Rebuild typical chimney above roof line  $25.00 - $50.00 per row of bricks (min. $400.00) 
Rebuild typical single flue chimney aove roof line  $200.00 - $400.00 per lin. ft. (min. $1,000.00)  

Exterior                 

Install galvanized or aluminum gutters and downspouts $5.00 - $10.00 per lin. ft. (min. $500.00)
Install aluminium soffits and fascia $8.00 - $16.00 per lin. ft. 
Install aluminium or vinyl siding $6.00 - $12.00 per sq. ft.
Repoint exterior wall (soft mortar) $3.00 - $6.00 per sq. ft. (min. $500.00)
Repoint exterior wall (hard mortar) $5.00 - $10.00 per sq. ft. (min $500.00)
Parge foundation walls $3.00 - $6.00 per sq. ft.
Dampproof foundation walls and install weeping tile $150.00 - $300.00 per lin. ft. (min. $3,000.00)
Install a deck $25.00 - $50.00 per sq. ft. (min. $1,000.00)
Resurface existing asphalt driveway $2.00 - $4.00 per sq. ft.
Install interlocking brick driveway $8.00 - $16.00 per sq. ft.
Rebuild exterior basement stairwell $5,000.00 and up
Build detached garage $70.00 - $140.00 per sq. ft.
Build retaining wall (wood) $20.00 - $40.00 per sq. ft.
Build retaining wall (concrete) $30.00 - $60.00 per sq. ft. (min. $500.00)
Painting (trim only) $2,000.00 - $4,000.00 and up
Painting (trim and wall surfaces) $5,000.00 and up

Structure

Underpin one corner of house $5,000.00 and up
Underpin or add foundations $300.00 and up per lin. ft. (min. $3,000.00)
Lower basement floor by underpining and/or bench footings $50.00 - $300.00 per lin. ft. (min. $5,000.00)
Replace deteriorating sill beam with concrete $60.00 and up per lin. ft. (min. $2,000.00)
Install basement support post with proper foundation $800.00 - $1,600.00
Perform chemical treatment for termites $2,000.00 and up
Repair minor crack in poured concrete foundation $400.00 - $800.00 

Electrical

Upgrade electrical service to 100 amps (including new pannel) $1,200.00 - $3,000.00
Upgrade electrical service to 100 amps (if suitably sized panel already exists) $800.00 - $1,600.00
Upgrade electrical service to 200 amps $1,700.00 - $3,500.00
Install new circuit break panel $700.00 - $1,400.00
Replace circuit breaker (20 amp or less) $100.00 - $200.00
Add 120 volt circuit (microwave, freezer, etc.) $150.00 - $300.00
Add 240 volt circuit (dryer, stove, etc.) $300.00 - $600.00
Add conventional receptacle $200.00 - $400.00
Replace conventional receptacle with ground fault circuit receptacle $70.00 - $140.00
Replace conventional receptacle with aluminium compatible type (CO/ALR) (assuming several are required) $60.00 - $120.00 each
Upgrade entire house with aluminium compatible receptacles, connectors, etc. $1,000.00 - $2,000.00
Rewire electrical outlet with reversed polarity (assuming electrician already out there) $5.00 - $10.00 each
Replace know & tube wiring with conventional wiring (per room) $1,000.00 - $2,000.00

Heating

Install mid-efficiency forced-air furnace $2,500.00 - $5,000.00
Install high-efficiency forced-air furnace $3,500.00 - $7,000.00
Install humidifier $300.00 - $600.00
Install electronic air filter $800.00 - $1,600.00
Install mid-efficiency boiler $3,500.00 - $7,000.00
Install high-efficiency boiler $6,000.00 - $120,000.00
Install circulating pump $400.00 - $600.00
Install chimney liner for gas appliance $500.00 - $1,000.00
Install chimney liner for oil appliance $700.00 - $1,800.00
Install programmable thermostat $200.00 - $400.00
Replace indoor oil tank $1,200.00 - $2,500.00
Remove oil tank from basement $600.00 and up
Remove abandoned underground oil tank $10,000.00 and up
Replace radiator valve $300.00 - $600.00
Add electric baseboard heater $250.00 - $500.00
Convert from hot water heating to forced-air (bungalow) $10,000.00 - $20,000.00
Convert from hot water heating to forced-air (two storey) $15,000.00 - $30,000.00
Clean ductwork $300.00 - $600.00

Cooling/Heat Pumps

Add central air conditioning on existing forced-air system $3,000.00 and up
Add heat pump to forced-air system $4,000.00 - $8,000.00
Replace heat pump or air conditioning condenser $1,200.00 - $2,500.00
Install independent air conditioning system $10,000.00 - $20,000.00
Install ductless air conditioning system $3,000.00 - $7,000.00

Insulation

Insulate open attic to modern standards $0.80 - $1.60 per sq. ft.
Blow insulation into flat roof, cathedral ceiling or wall cavity $2.00 - $4.00 per sq. ft.
Improve attic ventilation $30.00 - $60.00 per vent

Plumbing

Replace galvanized piping with copper (two storey with one bathroom) $2,500.00 - $5,000.00
Replace water line to house $2,00.00 and up
Replace toilet $500.00 and up
Replace basin, including faucets $750.00 and up
Replace bathtub, including ceramic tile and facuets $2,500.00 and up
Install whirlpool bath, including faucets $3,500.00 and up
Retile bathtub enclosure $1,000.00 - $2,000.00
Replace leaking shower stall pan $1,000.00 - $2,000.00
Rebuild tile shower stall $2,500.00 - $5,000.00
Replace laundry tubs $400.00 - $800.00
Remodel four-piece bathroom completely $6,000.00 - $50,000.00
Connect waste plumbing system to municipal sewers  $5,000.00 and up
Install submersible pump $1,000.00 and up
Install suction or jet pump $700.00 and up
Install modest basement bathroom $6,000.00 and up

Interior

Add drywall over plaster $4.00 - $8.00 per sq. ft.
Sand and refinish hardwood floors $2.00 - $4.00 per sq. ft.
Install replacement windows $40.00 - $120.00 per sq. ft.
Install storm window $200.00 - $400.00
Install masonry fireplace (if flue already roughed-in) $3,000.00 and up
Install zero-clearance fireplace (including chimney) $3,500.00 and up
Install glass doors on fireplace $300.00 and up


These estimates aren't meant to deter you from purchasing, or selling, a home that needs a bit of TLC, but rather to help you make an informed decision when it comes to your property. If you want to learn more about your home and enjoyed these tips, order a copy of the Home Reference Book, or start following us on Twitter, or like us on Facebook.
Cick here to download a PDF version of this article.  

Topics: Home Reference Book, Homeowners, Home Inspection, Homeowners Association, Carson Dunlop, Homeowner Tips